


If you want to automate the provisioning of your infrastructure in AWS you would use CloudFormation. You can code some or even all your infrastructure with the use of the CloudFormation template language, which is written in YAML or JSON. JSON and more so YAML are very human-readable, providing a way to document your Infrastructure as well. The disadvantage of JSON and YAML is that it lacks the abstraction and reuse of a general-purpose languages, such as C#, GO, PowerShell and such like. Many times, a few lines of code in one of these languages can much more in JSON or YAML!
Amazon have seemed to notice this, and with the emergence of Pulumi, have developed the AWS Cloud Development Kit (CDK). The advantage to the CDK for AWS customers is that it’s an open source project, so no further cost.
The AWS Cloud Development Kit (CDK) is a software framework allowing you to use a general-purpose language to write code which is then provisioned through CloudFormation. As of the release of version 0.33.0, you can use five different general-purpose languages in the CDK. They are TypeScript, JavaScript, Java, Python and the one I’ll be demoing, C#.
I won’t be going into details on how to get started with setting up your environment to use the CDK with the language of your choice as AWS do a pretty good job themselves, which is detailed here Getting Started With the AWS CDK.
I’m going to talk through creating an app, initializing, compiling and deploying. The App I will be demoing will create an S3 bucket, which will be versioned, named and encrypted. Also, I’ll be adding a life cycle rule to expire any content within 30 days.
There are three parts to consider when using the CDK, they are Constructs, Stacks and Apps. Everything in the AWS CDK is a construct. A Construct is an AWS cloud component which we will use to create something, in this case an S3 bucket. The stack is your root construct. It will contain the constructs you have used to define your AWS environment. The main artifact of the CDK is the App, which is the wrapper to deploy your stack or stacks.
Getting started requires you to create a new folder and initialize empty Git repository. Once done, create the app by using the AWS Cloud Development Kit command line calling the command cdk init --language csharp.
The main two files I will be working with is of course the program.cs and our own stack cs file. Compiling the app is done with .NET core’s dotnet command line. Worth pointing out as well, this demo is performed using .NET Core 3 Preview 5.
Before defining the Program.cs file, lets create our stack. I’m going to show the completed MyStack.cs file and break down the main areas.
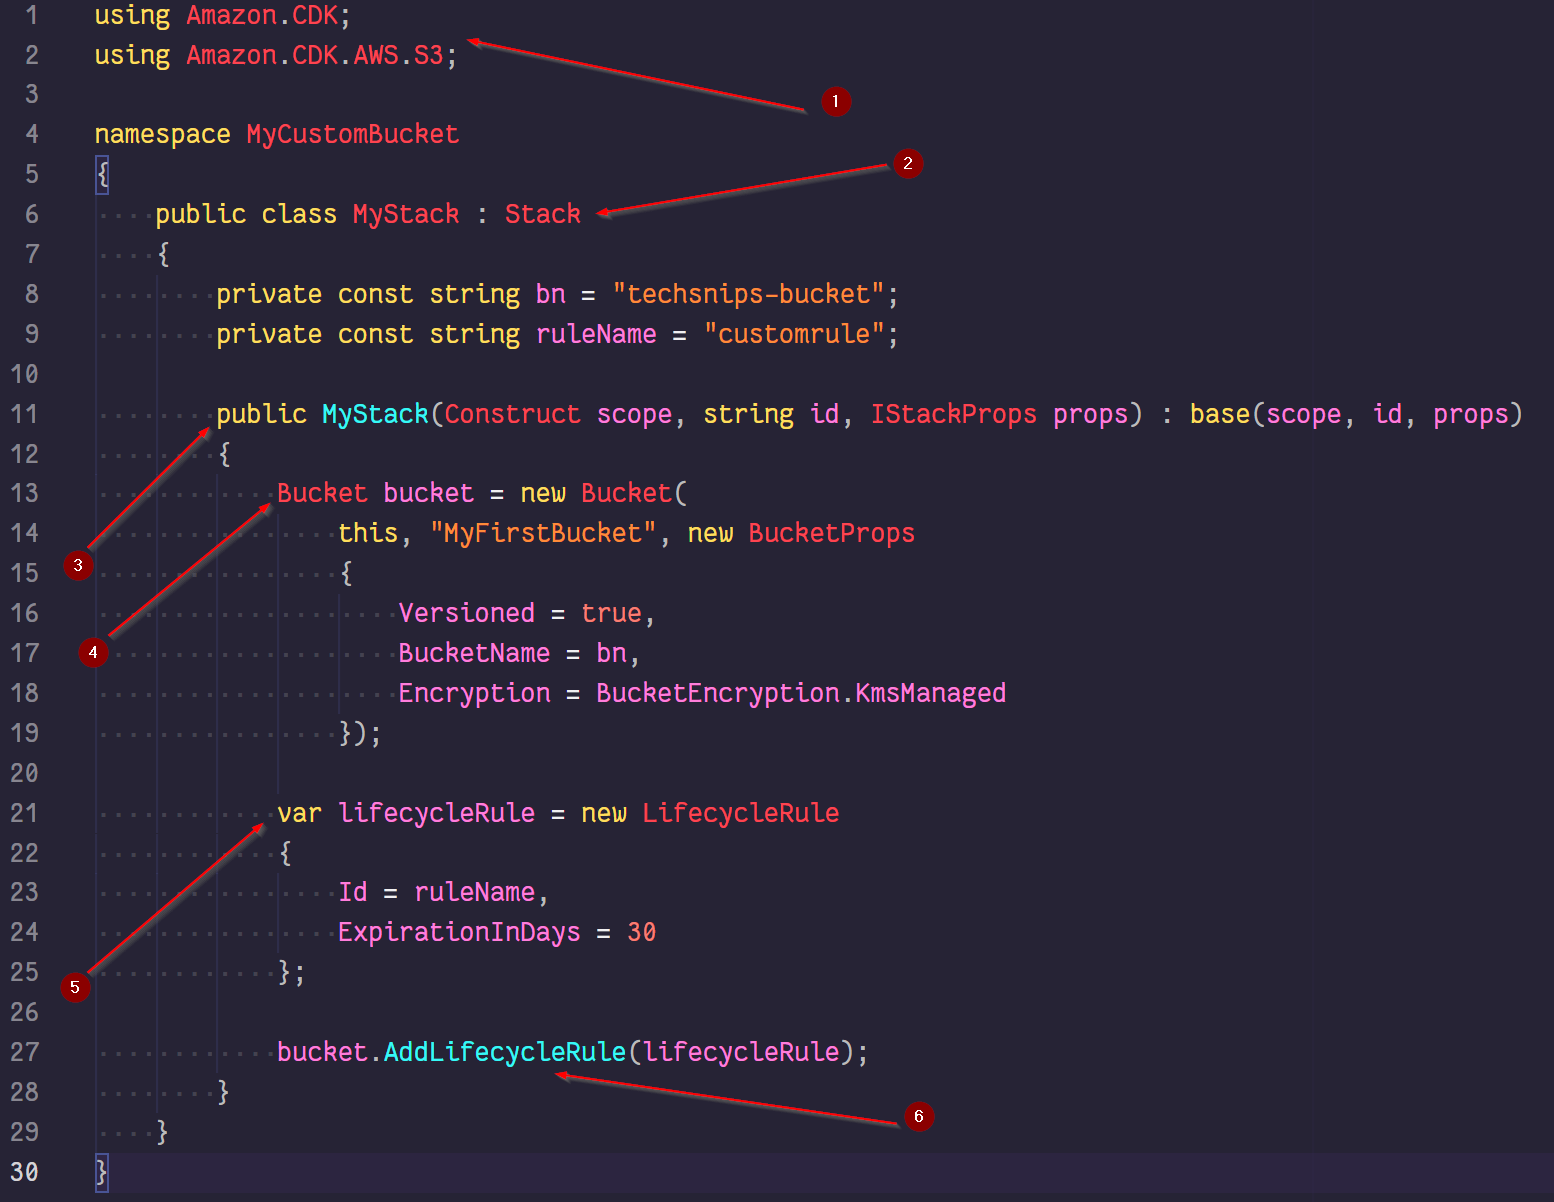
- The C# using directive is adding the namespace required to make use of the required constructs to build your environment. The AWS CDK has many namespaces available and are detailed here CDK .NET Reference. To add a namespace, the dotnet command line is used. This is done like so,
dotnet add package amazon.CDK.AWS.S3. - Creating your own stack is done by inheriting the Stack class. In this example I’ve created the derived class called MyStack.
-
The stack constructor signature we have inherited with our derived class, MyStack, has three main parameters, which you will notice on all constructs:
scope - Parent of this stack, usually a Program instance.
name - The name of the CloudFormation stack.
props - Stack properties.
These are populated when we initialise our MyStack class, which we will come to.
- Bucket is also a construct which is a part of the amazon.cdk.aws.s3 namespace. The bucket construct is a child of the stack. MyFirstBucket is an id of the bucket construct. The bucket props class (BucketProps) gives us the option to name the bucket (line 17). For this bucket I’ve enabled versioning and encryption.
- Declaration of a Life cycle rule happens on line 21, in which the properties of Id (naming of the rule) and ExpirationInDays are defined.
- The method on the bucket class, AddLifecycleRule, is called to add our life cycle rule previously created in step 5.
Now that we have MyStack.cs file, we can setup the program.cs. Here is how it’s done:
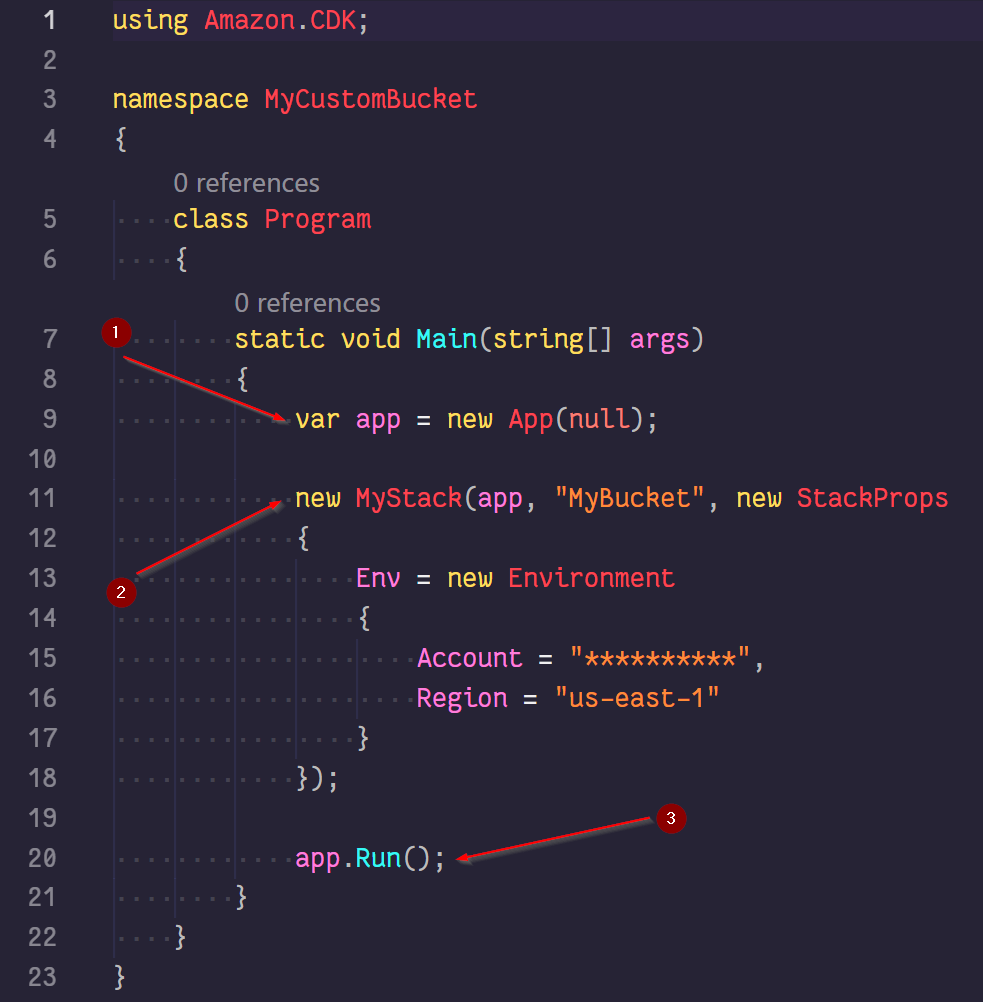
- A new object is created from the App class. This line of code already exists when creating a new project with the
cdk initcommand. This is a representation of a CDK program. - We are now using the MyStack class we wrote to create our bucket. The StackProps class is used to allow us to define the AWS account Id and the region where the bucket will be created. By making use of the StackProps class in this way by setting up a new environment allows us to create buckets across multiple accounts and regions.
- Lastly, the run method is called to invoke the process of building our bucket.
To pull all of this together we are required to build the project and all of its dependencies. This is done by running the dotnet build command from the directory of our Csharp files, program.cs and MyStack.cs:
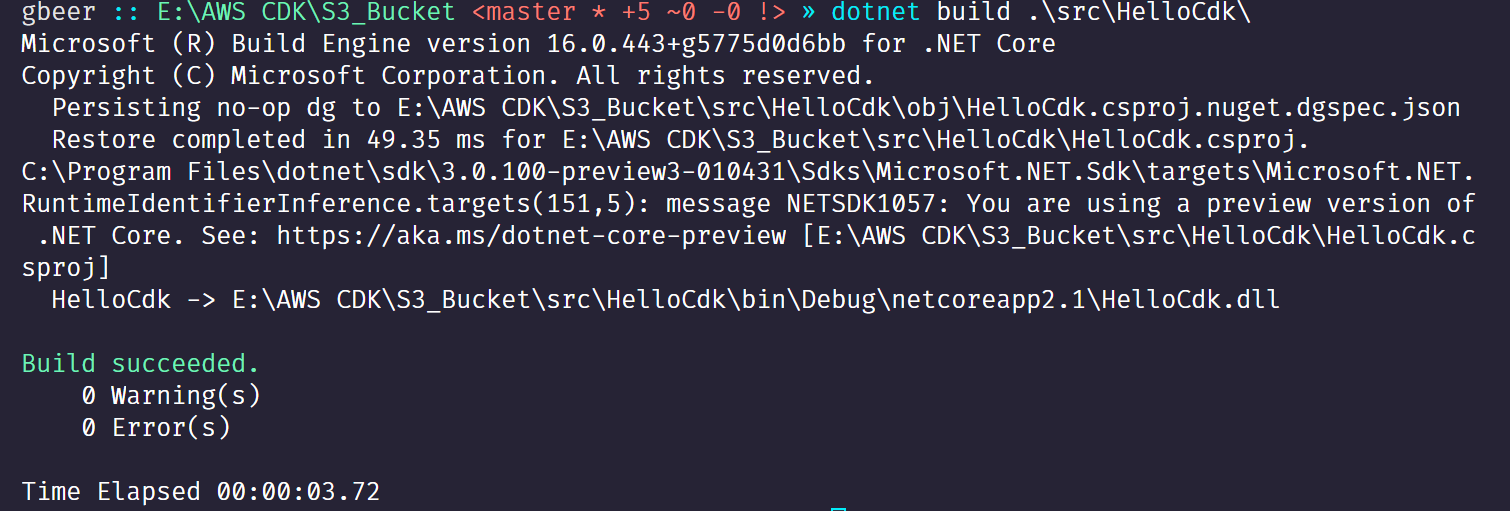
We now have a Build succeeded, so let’s deploy our app!
Running from the root folder, run the cdk deploy command:

The above screen gives us the details on the deployment and the steps. Notice that as well as the bucket being created, we have a CloudFormation stack also created. Checking from within the console, I can see that our work was successful:
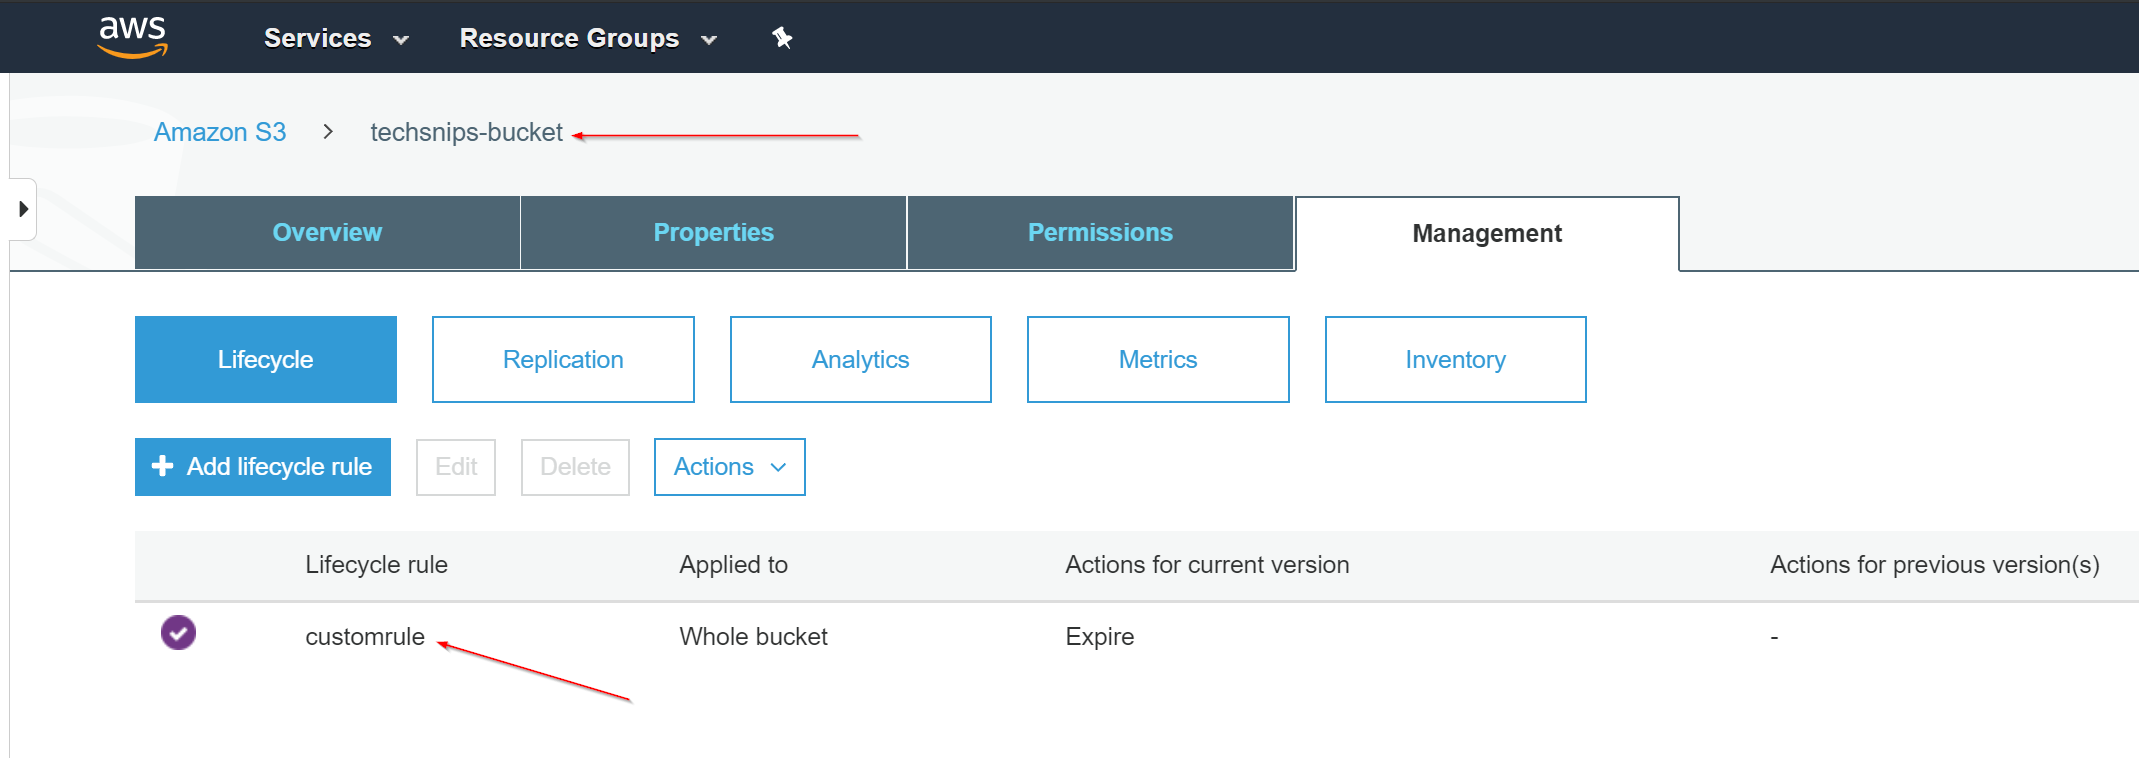
The two arrows are pointing at the bucket name and the custom Lifecycle rule we attached.
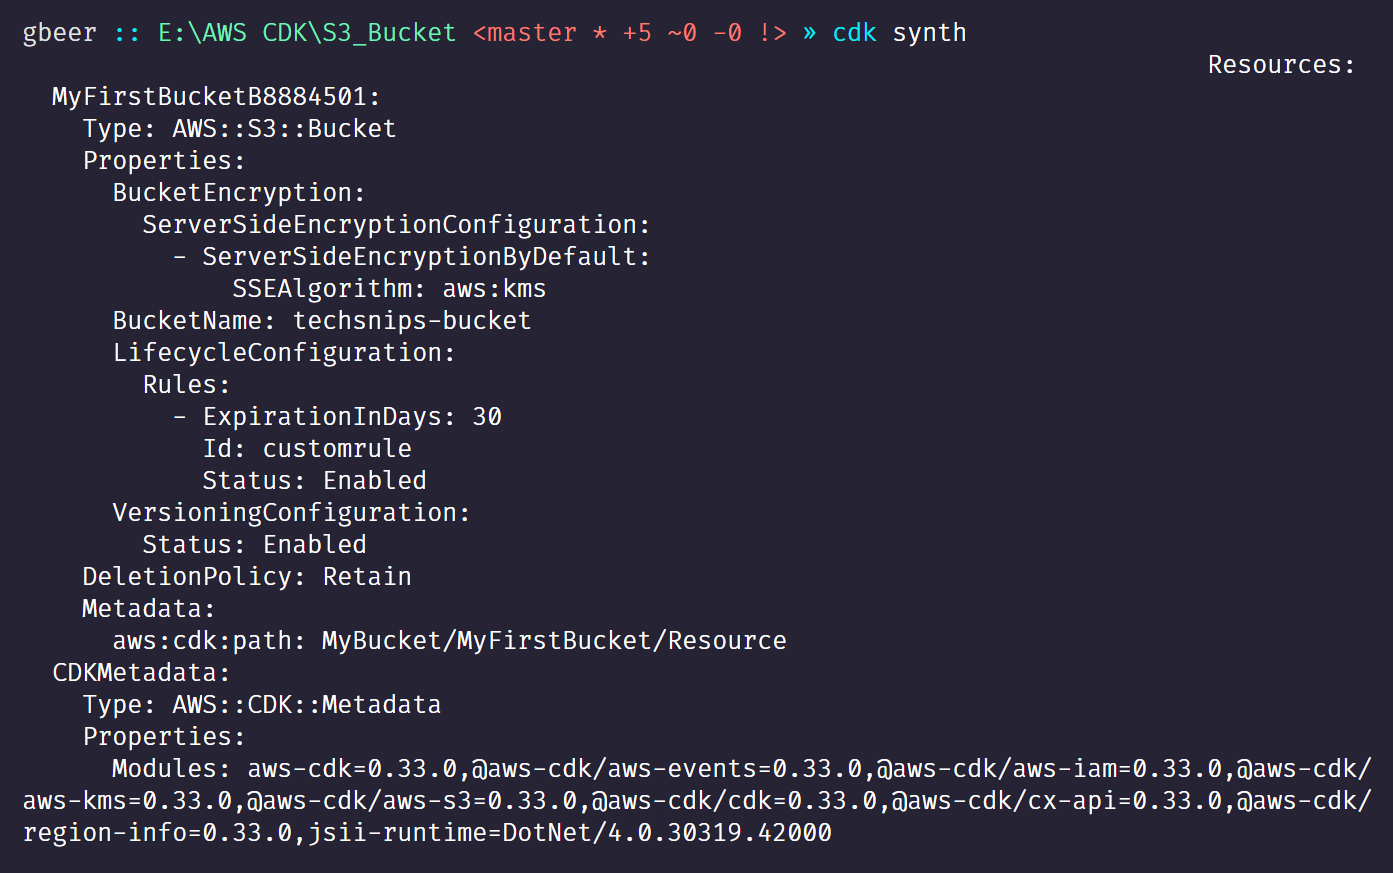
Viewing the CloudFormation template that our code created can be done through the CDK command line by typing in cdk synth:
I hope this article has shown the great potential in the AWS CDK. The documentation by AWS has greatly improved, with the CDK reference the standout. There is so much more you can do with the CDK, even down to creating your own constructs. So, take a look and get building!
Should you wish to try out this demo yourself, the code shown is up on my GitHub account. GitHub Link to project