To create a virtual machine in Azure requires the configuration of several different components. You need to consider a Resource group,
Storage options, a virtual network then the virtual machine itself! To set all these components you need to know what they are;
A Location, Storage types, Operating systems…
To make this process easier for myself I created my AzureRM.VM.Tools PowerShell Module. I wanted to share this in the
hope it might help someone else. This article is how the module works and usage, I’ve commented the code so each piece
is labelled should you wish to know how its constructed.
Let’s list the functions in the module:
Connect-AZRm
Connect to azureGet-AZrMPublisher
Finds an image publisherGet-AZrMVmOptionSizes
List VM size options by locationNew-AZRmRG
Create resource groupNew-AZRmNetwork
Setup networkNew-AZRmStorageAccount(Called in New-AZRmVirtualMachine)
Set storage accountNew-AZRmVirtualMachine
Creates the virtual machine and configures all componentsConnect-AZRmRDP
RDP connection to a Virtual Machine via Public IP Address
Not listed here, but heavily used, is the Function DynamicLocationParam. This is a dynamic parameter that I’ve wrapped as a
function to make it reusable. The purpose of the Dynamic parameter is to tab through the locations which you can use to build
in. I found this useful when creating in Azure.
There are three main functions in this module that do the actually building of the environment and virtual machine. The rest
are Helper functions and useful tools. Let’s look at those now.
I found when it came to configuring and building in Azure with PowerShell, that a lot of the cmdlets provided didn’t allow me
to tab through the options. So finding names of options became time consuming. Get-AZrMVmOptionSizes allowed me by just passing
in the location, to find quickly the name, cores and memory that I could use to build my VM. Same applied to Get-AZrMPublisher
function, which I could search with a wildcard the names of the publishers I could use.
By typing Get-AZrMPublisher -Publisher MicrosoftWindows* -Location uksouth I quickly found the following information:
     PublisherName                 Location
     -------------                 --------
     MicrosoftWindowsDesktop       uksouth
     MicrosoftWindowsServer        uksouth
     MicrosoftWindowsServerHPCPack uksouth
You are probably wondering why I created the function New-AZRmRG when you can use the New-AzureRmResourceGroup to create a
resource group. The reason was so I could make use of the Location Dynamic parameter to find a location easier to create the
resource group in. Also if the group does not exist, create. This helper function is used in the main functions as well.
Get-AZrMPublisher and Get-AZrMVmOptionSizes are used to check the values passed in New-AZRmVirtualMachine are valid.
Onto the main functions, starting with New-AZRmNetwork. This is an example, which to make readable I’ve splatted the
parameters:
$ConfigureNetwork = @{
    ResourceGroupName       = 'NetVM'
    NetInterfaceName        = 'Network01'
    AllocationMethod        = 'Static'
    VNetName                = 'Vnet01'
    SubnetName              = 'Subnet01'
    VNetSubnetAddressPrefix = '10.0.0.0/24'
    VNetAddressPrefix       = '10.0.0.0/16'
    Location                = 'westeurope'
    Verbose                 = $true
}
This function is creating a few things here; A resource group, Public IP Address, two network rules (Remote Desktop and Web Traffic), Security Group attaching the rules, Subnet, Virtual Network and the network interface. Let’s run the function:
Excellent, we’ve setup our network. Timing wise, I wrapped the Measure-Command around New-AZRmNetwork @ConfigureNetwork and it
took 55 seconds! Looking in the console confirms the output from PowerShell:
Now we go move onto create the Virtual Machine now. Again, I’ve splatted the parameters to help make it clearer (I also prefer splatting as opposed to a long string of parameters across the screen!).
$DefineVmParams = @{
    ResourceGroupName  = 'NetVM'
    VirtualMachineName = 'ServerVM2012'
    VMSizeOption       = 'Standard_A2'
    OSPlatform         = 'Windows'
    ComputerName       = 'Server1'
    Location           = 'WestEurope'
    PublisherName      = 'MicrosoftWindowsServer'
    Offer              = 'WindowsServer'
    Skus               = '2012-R2-Datacenter'
    NetInterFaceName   = 'Network01'
    StorageName        = 'vmstorageunit4'
    StorageType        = 'Standard_GRS'
    ProvisionVMAgent   = $true
    EnableAutoUpdate   = $true
    Verbose            = $true
}
There is a few more to fill out, but taking into account how much is created I feel it’s a small outlay.
Looking at the above, hopefully you can see the benefit of the smaller functions at the start of this
article. We now can easily find VM Sizes, PublisherName and offer. The storage account is created in
this function and uses the help function New-AZRmStorageAccount to do this. (You can run this command separately
and does allow tab completion for the storage types). A few custom names to add and we are ready to run.
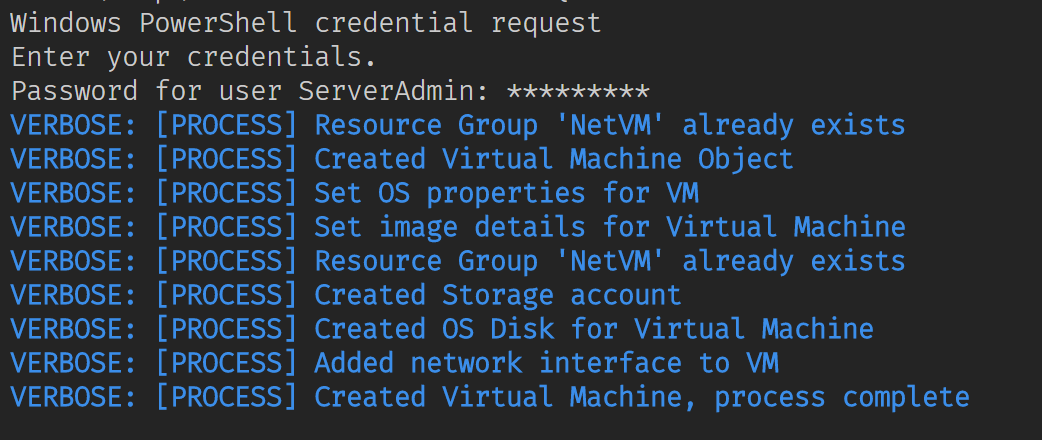
Note the ‘-Credentials’ parameter - this is the account details you wish to use to login to your newly built VM.
PowerShell is telling us from the output the VM is built.
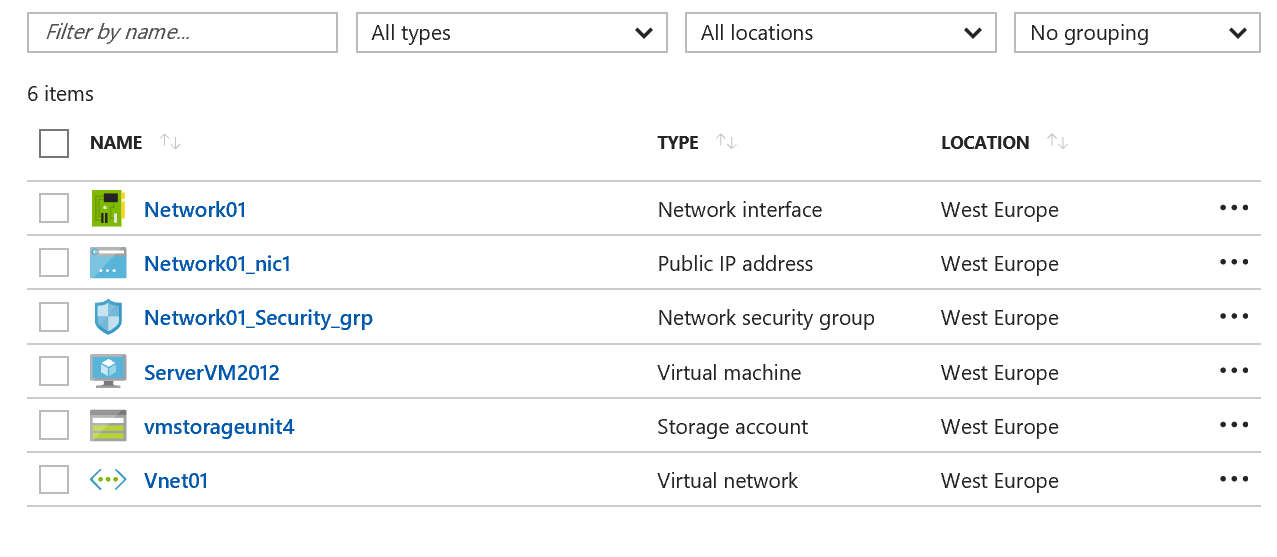
Measure-Command tells me it took 6 minutes 40 seconds to create a VM with a storage account. Not bad ! Let’s check the console…
All looks good ! So with this module, once we set our parameters we have setup a network, storage account and a virtual machine (Windows Server 2012 R2 in this example) in less 8 minutes !
I’ve put the code up on my GitHub and welcome any feedback. As always, I hope it helps and saves you some time should you wish to build Virtual Machines with PowerShell !


